

A Step-by-Step Guide to Installing an Over-the-Range Microwave
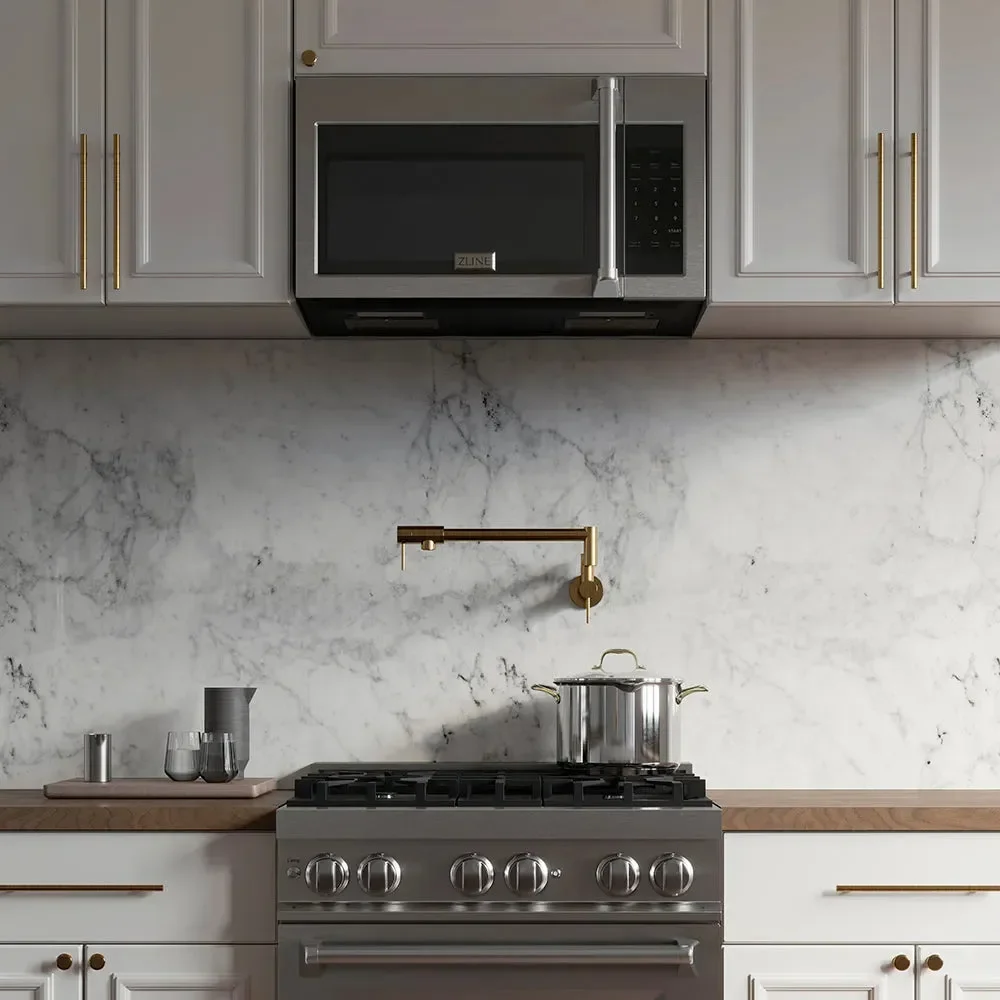
/Over-the-range (OTR) microwaves are the ultimate kitchen multitaskers. By combining a microwave, a ventilation hood, and often a convection oven, they save precious counter space while keeping your kitchen air clear.
While mounting an appliance might sound like a job for a pro, installing an OTR microwave is a totally doable DIY project. With a free afternoon, a few basic tools, and a sturdy friend to help, you can upgrade your kitchen in just a few hours.
1. Before You Begin: The Prep Phase
The secret to a smooth installation is in the preparation. Before you reach for your drill, check these three critical requirements:
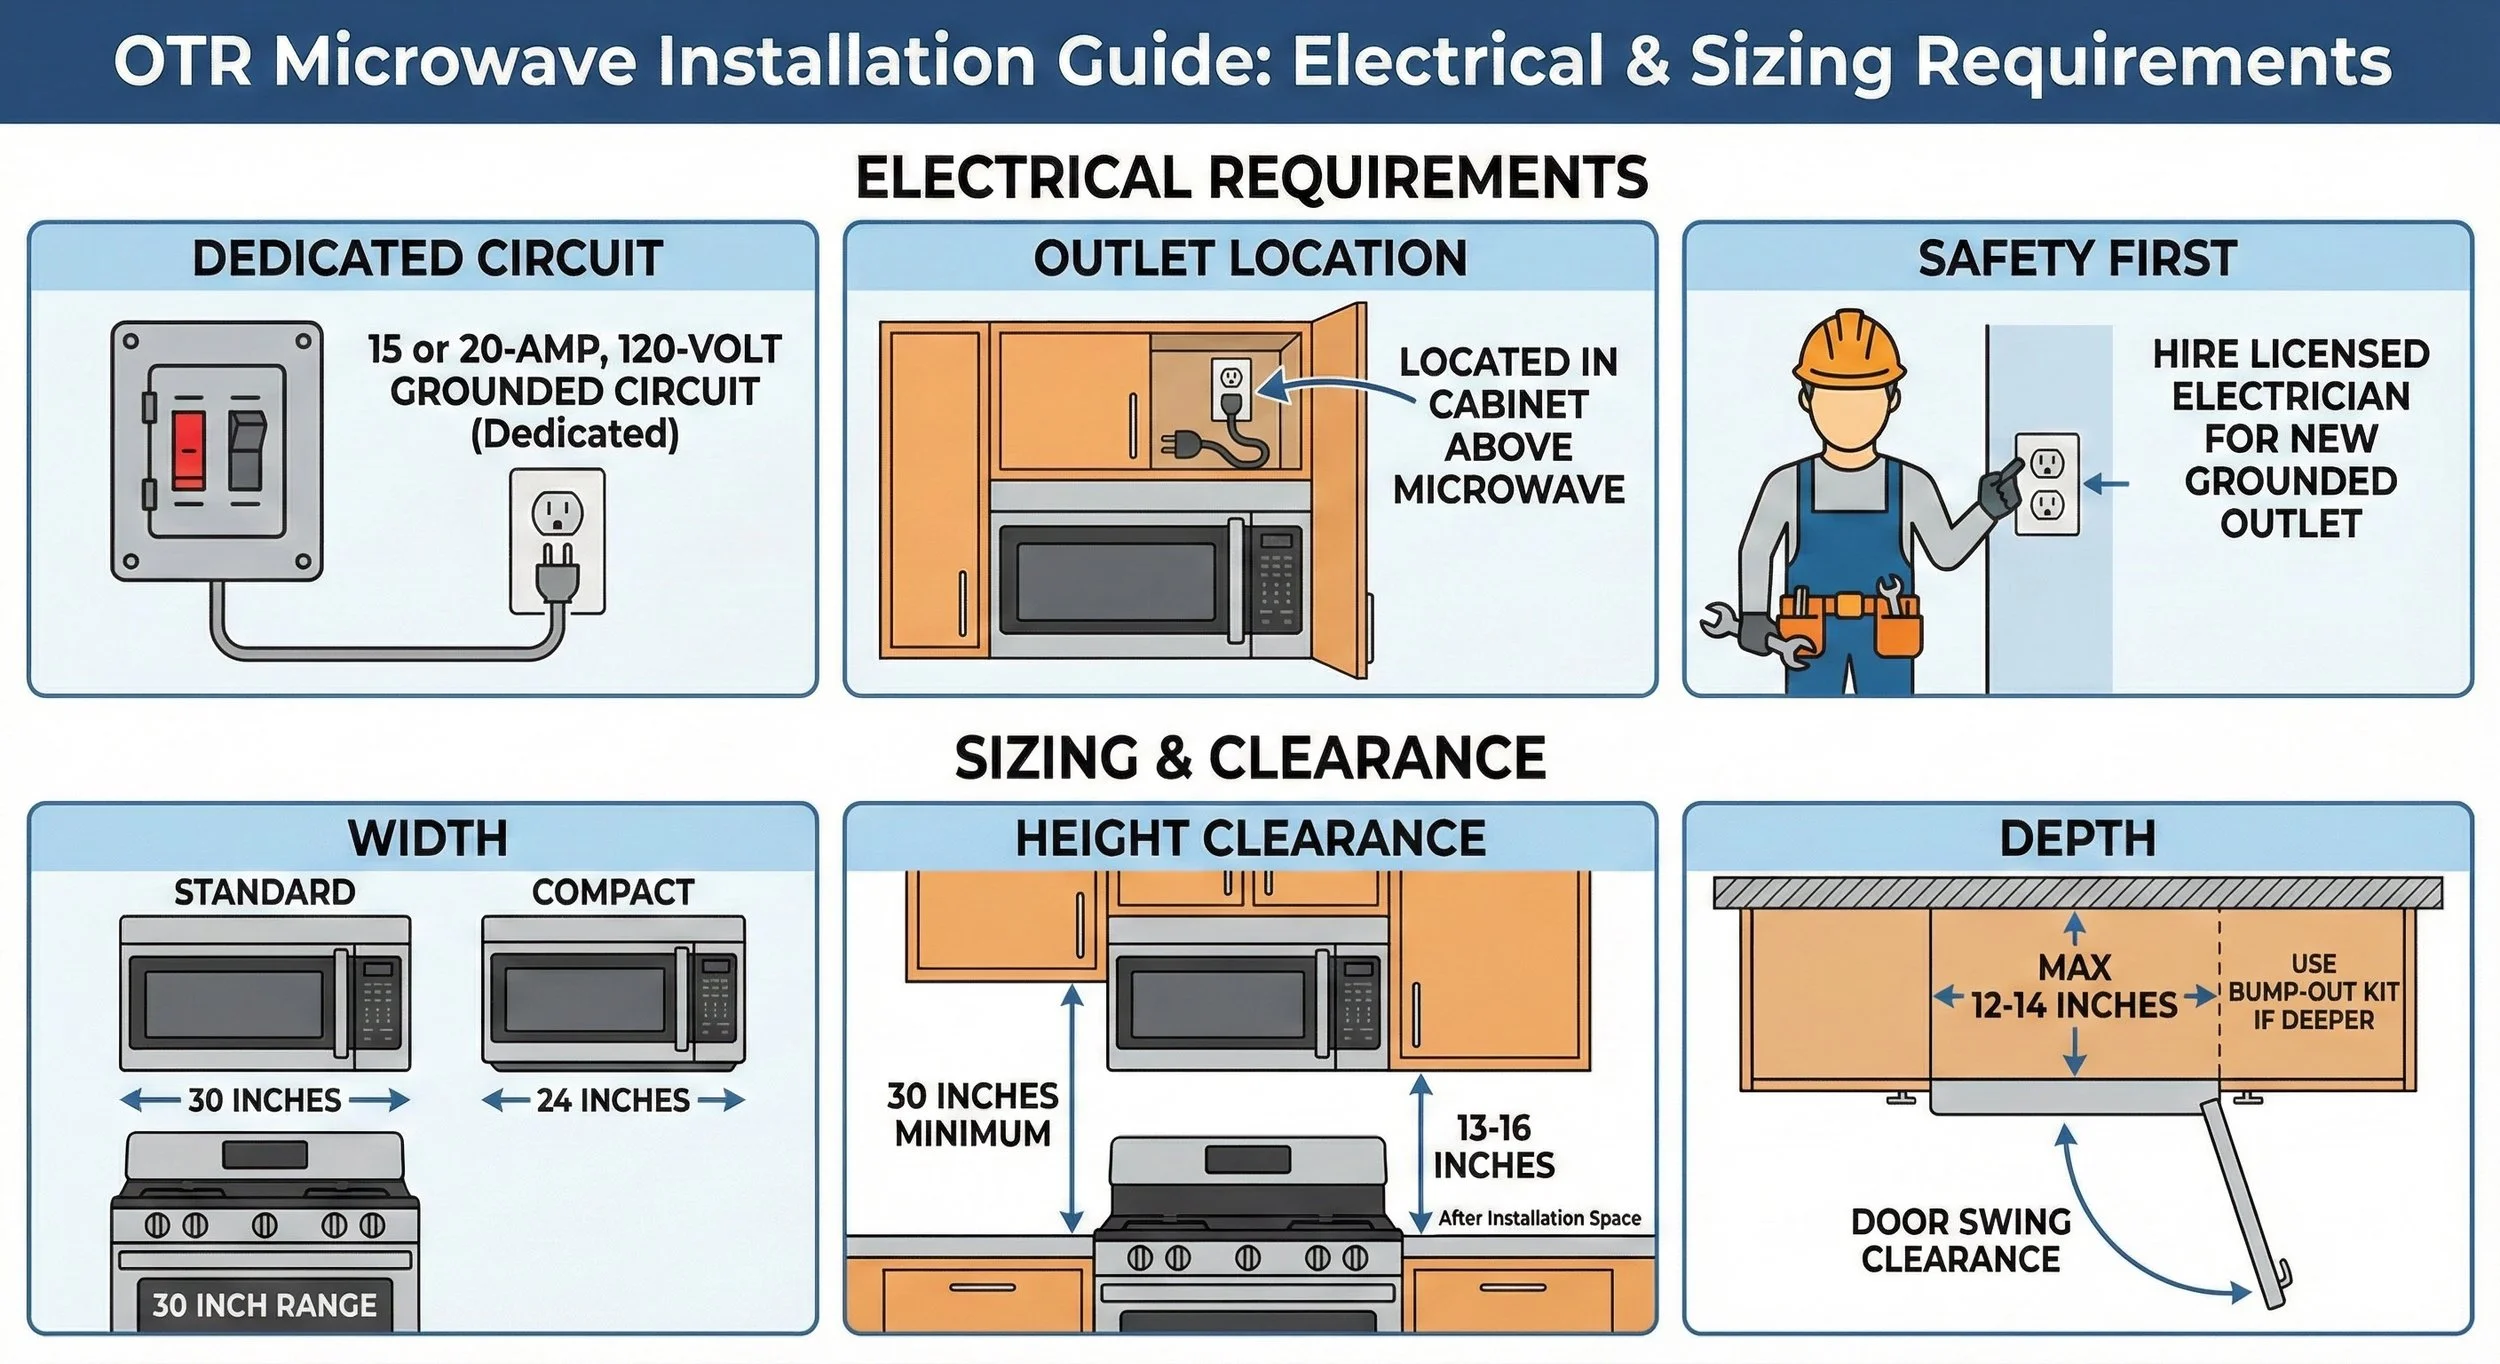
Electrical Requirements
Dedicated Circuit: Most OTR microwaves require a dedicated 15 or 20-amp, 120-volt grounded circuit.
Outlet Location: The outlet should be located in the cabinet directly above where the microwave will hang.
Safety First: If you don't have a grounded outlet in that cabinet, we recommend hiring a licensed electrician to install one before you mount the unit.
Sizing & Clearance
Width: Standard units are 30 inches wide to match standard ranges. Compact models are available at 24 inches.
Height Clearance: Industry standards generally require a minimum of 30 inches between the cooktop and the bottom of the upper cabinet. After the microwave is installed, you should have roughly 13 to 16 inches of space between the cooktop and the bottom of the microwave.
Depth: Ensure your upper cabinets are no more than 12 to 14 inches deep. If they are deeper, you may need a "bump-out" kit so the microwave door can swing open fully.
2. Your Installation Toolbox
Don’t start the job only to realize you’re missing a 1/2-inch drill bit! Gather these items first:
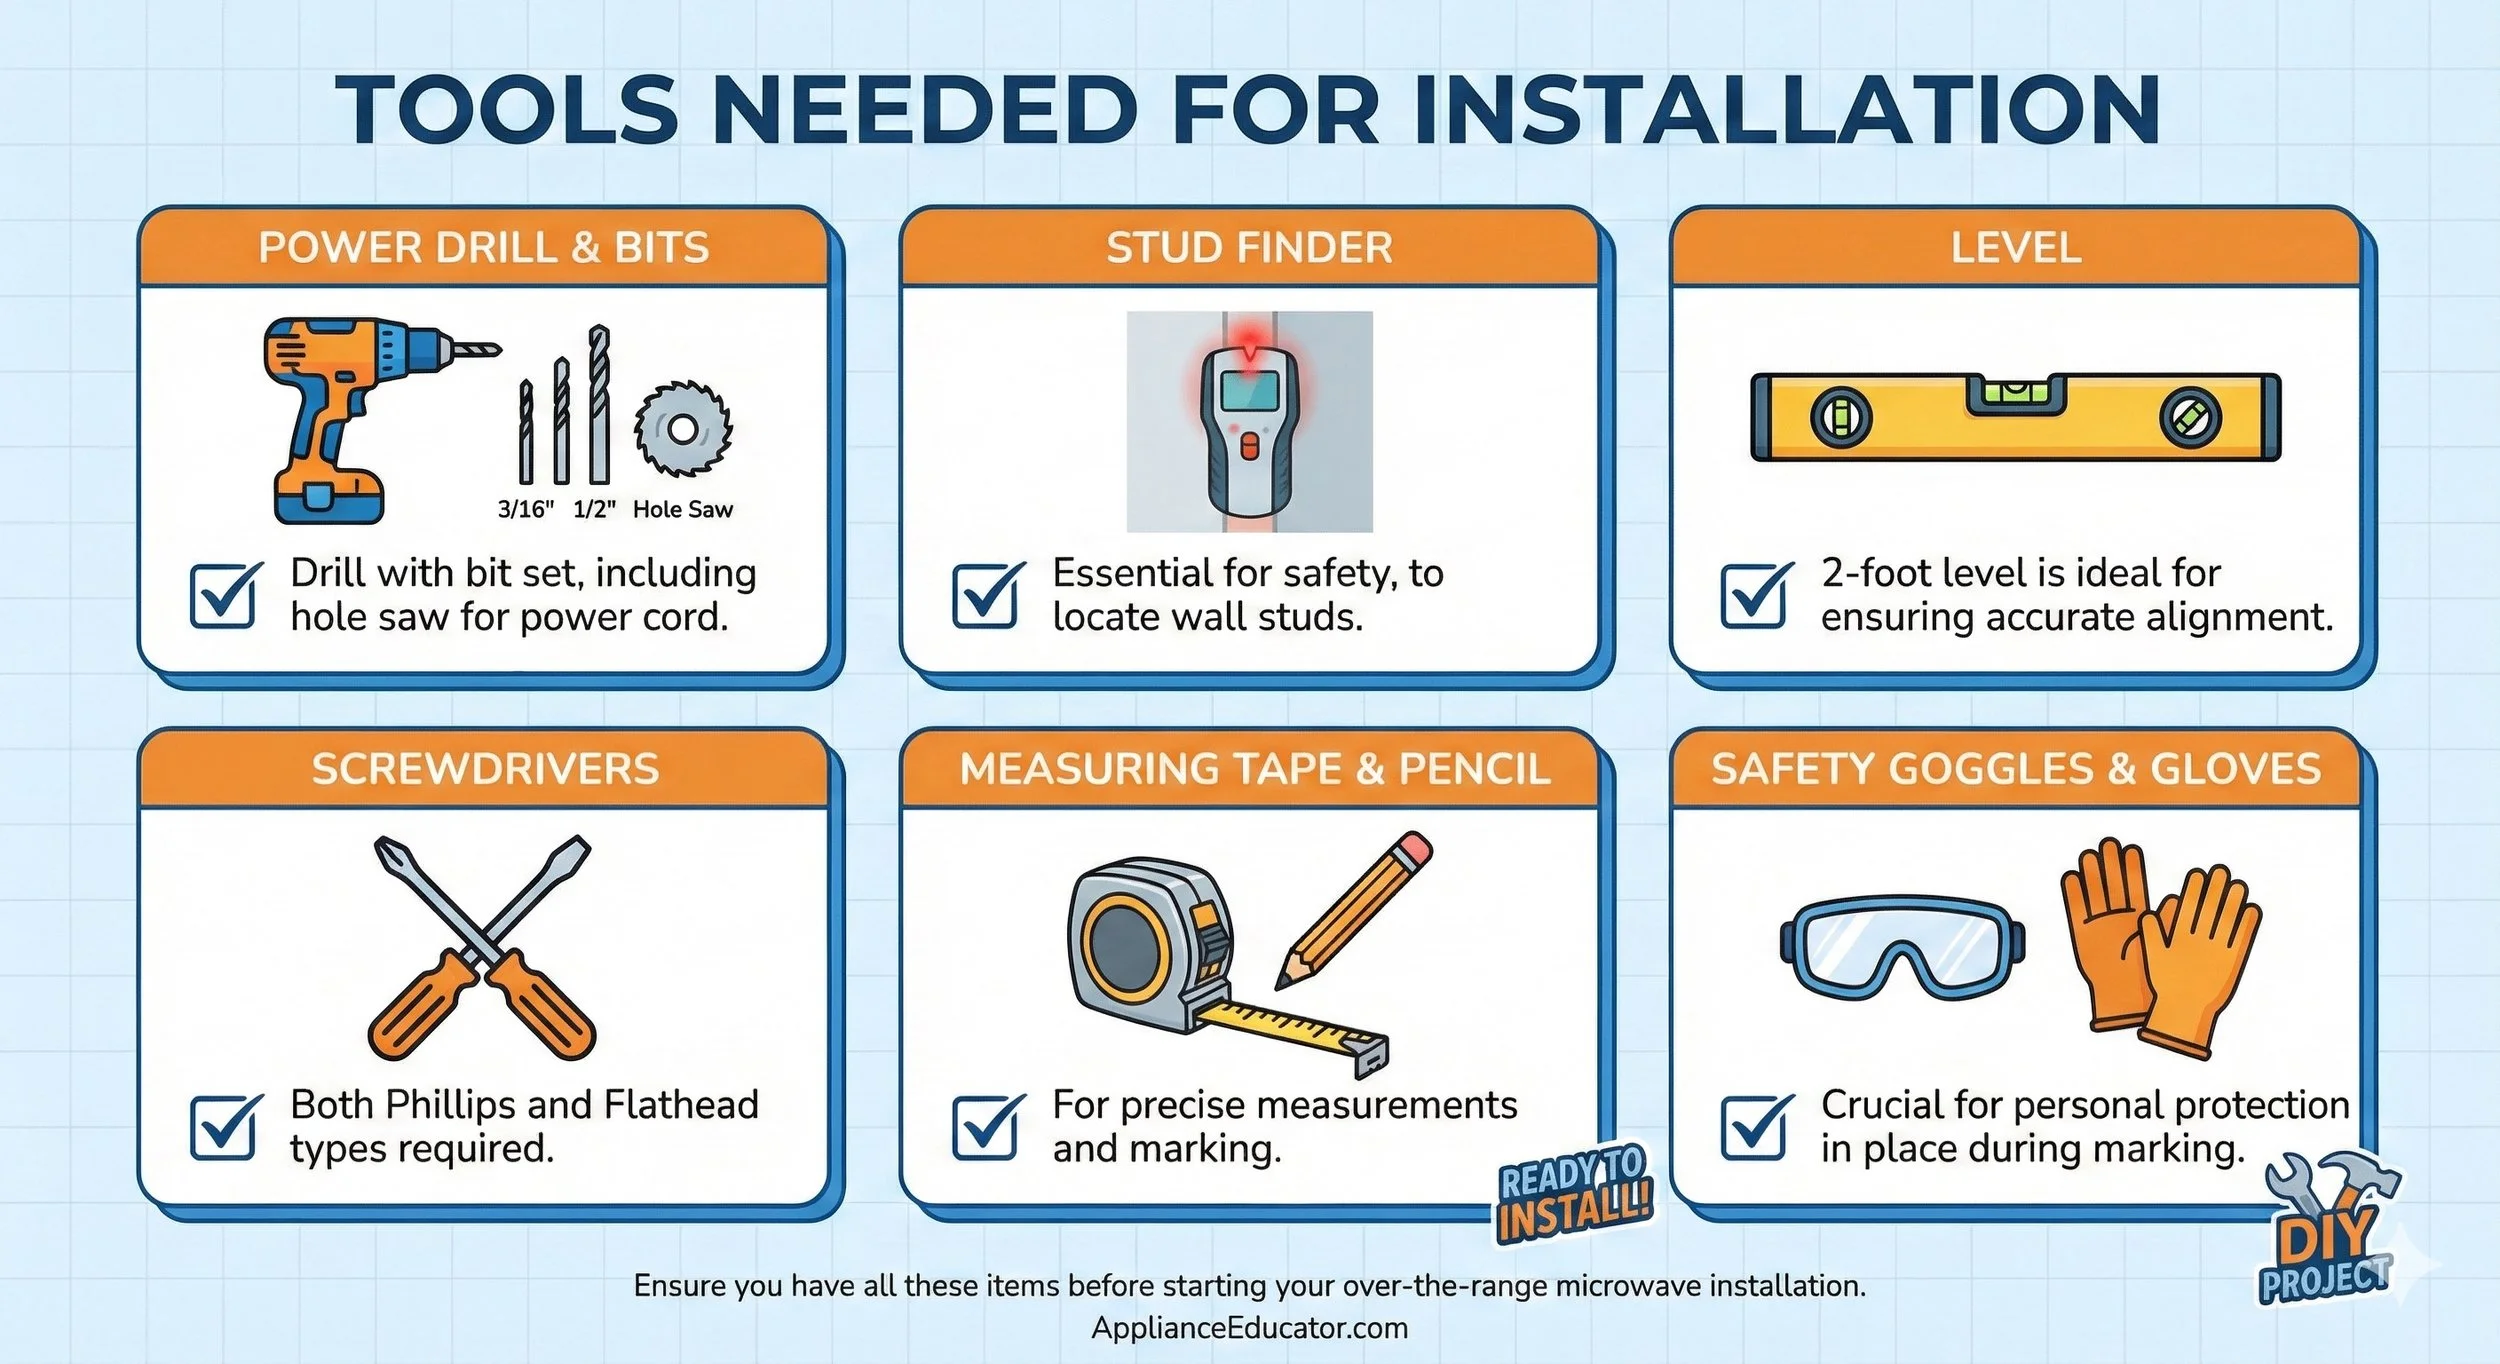
Tools Needed:
[ ] Power Drill with a set of bits (typically 3/16", 1/2", and a hole saw for the power cord).
[ ] Stud Finder (essential for safety).
[ ] Level (2-foot level is ideal).
[ ] Phillips & Flathead Screwdrivers.
[ ] Measuring Tape & Pencil.
[ ] Masking Tape (to hold templates in place).
[ ] Safety Goggles & Gloves.
Supplies:
[ ] The New Microwave (and all included hardware).
[ ] Wall & Cabinet Templates (included in the box).
[ ] Duct Tape or Clamps (if venting outside).
[ ] Wood Filler Blocks (if your cabinet has a recessed bottom).
3. Step-by-Step Installation Guide
Step 1: Remove the Old Unit
If you're replacing a unit, unplug it first. Have a friend support the weight of the microwave while you unscrew the top mounting bolts from inside the cabinet. Tilt the microwave forward and lift it off the wall bracket.
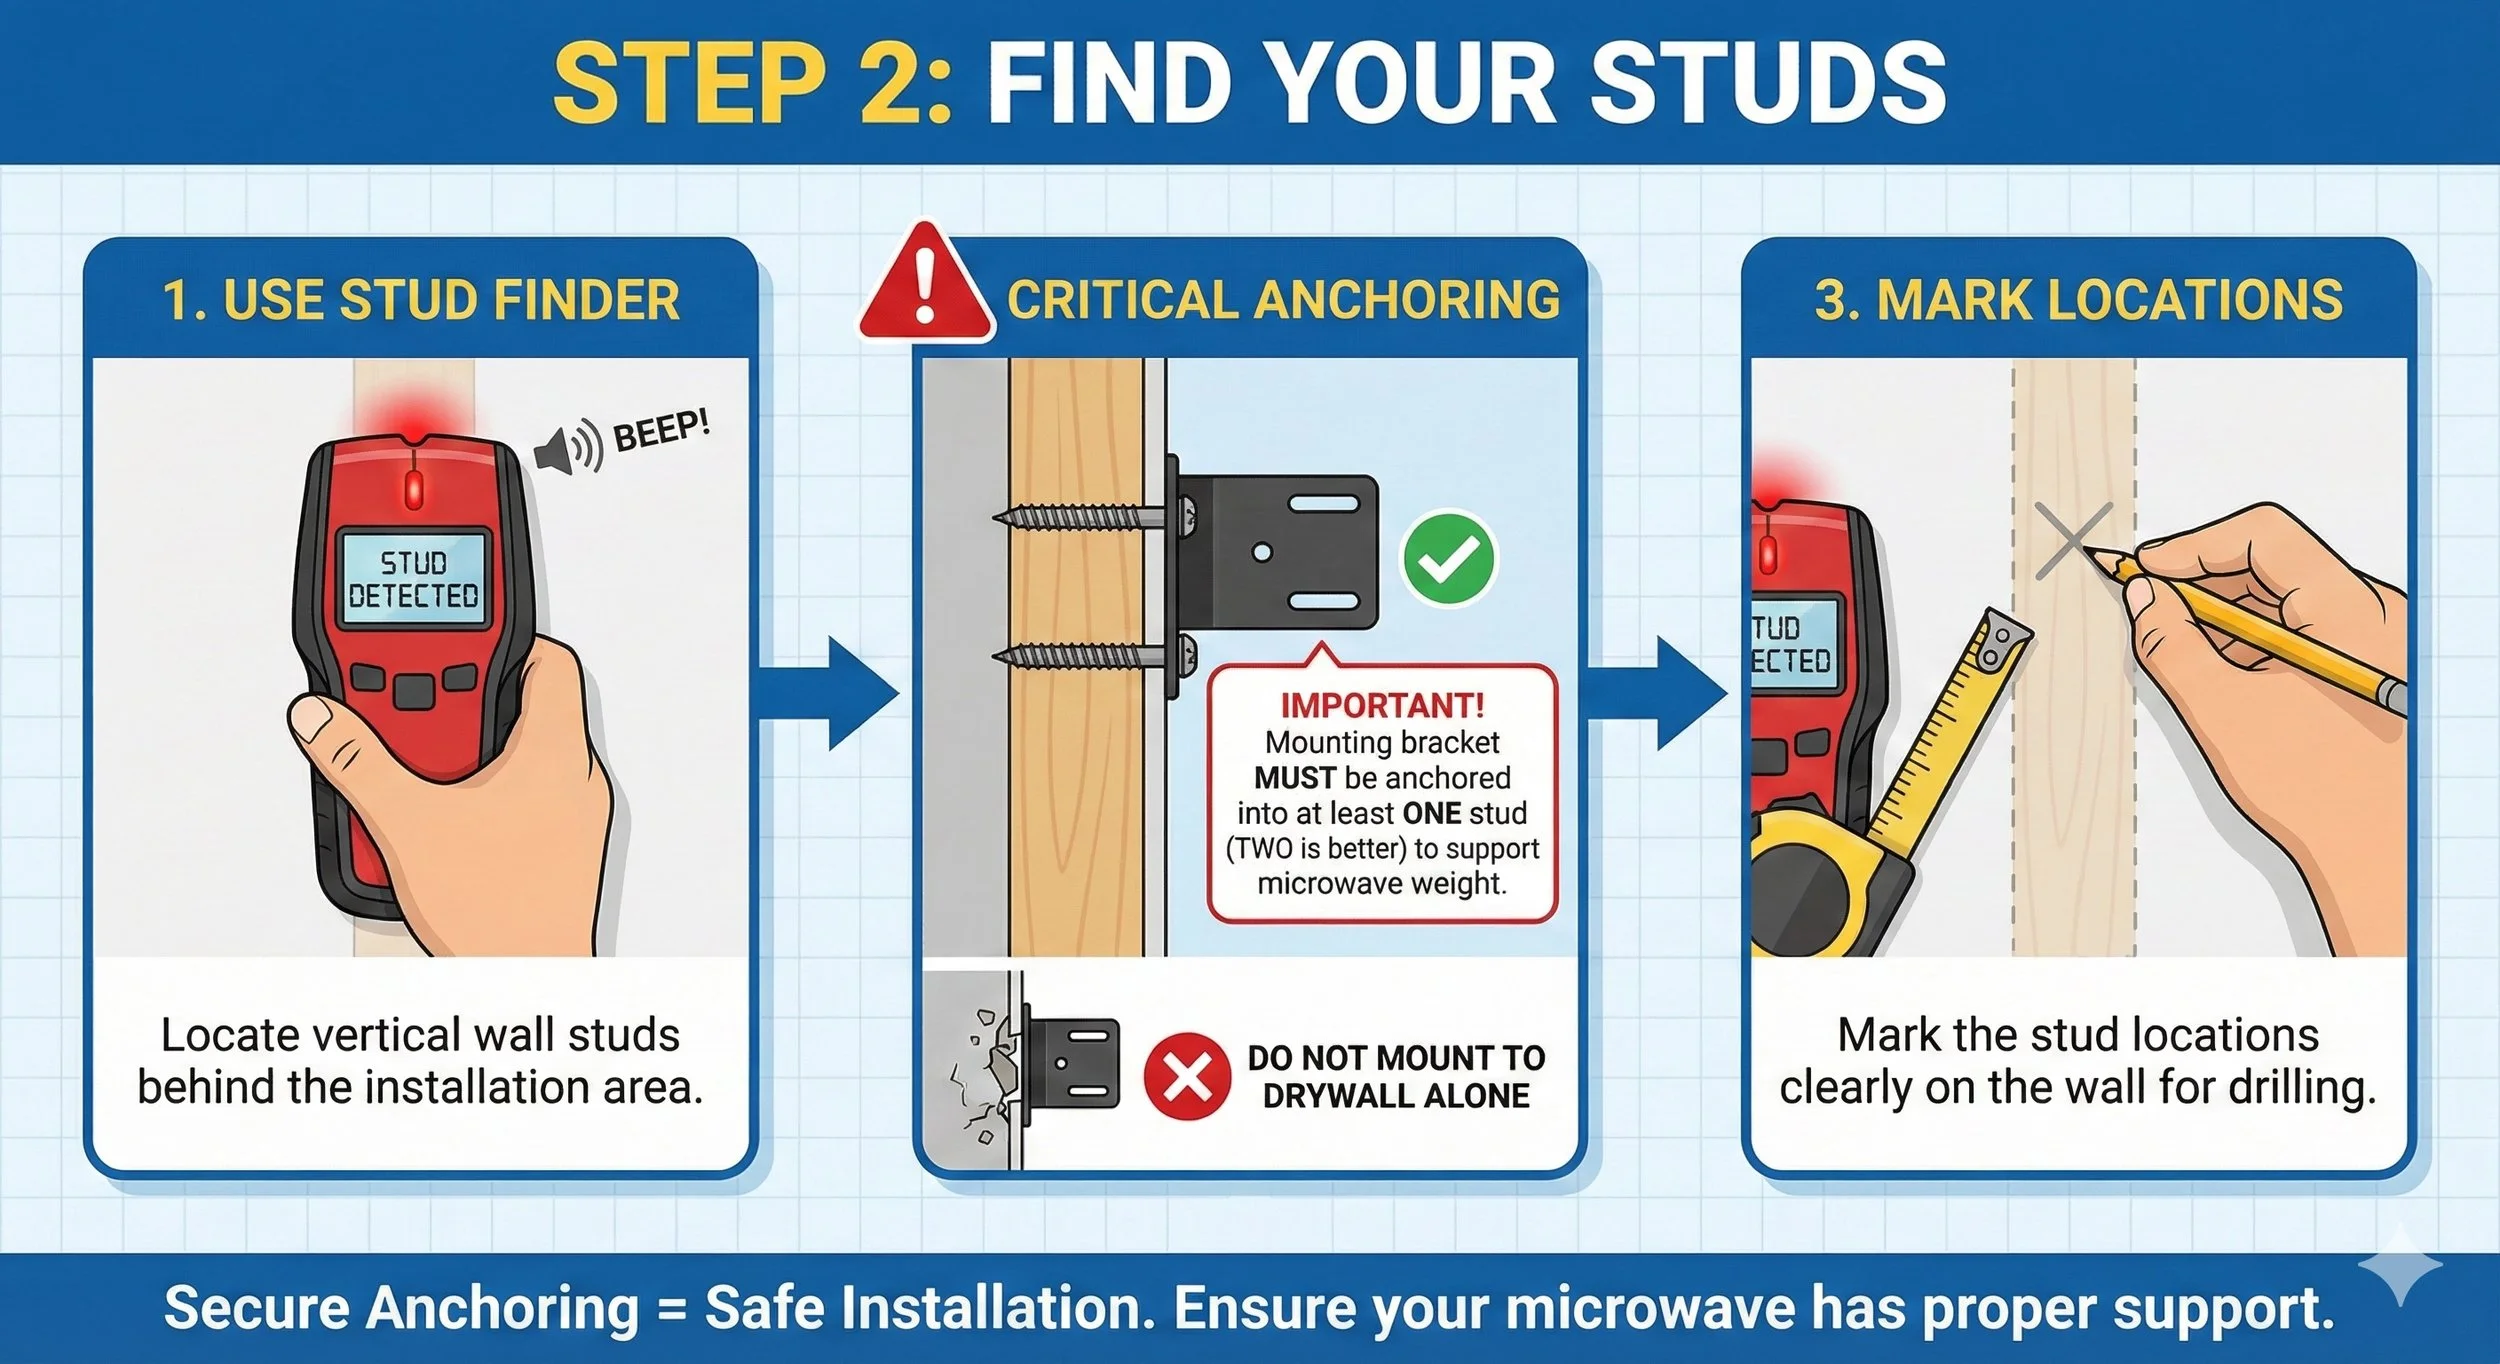
Step 2: Find Your Studs
Use your stud finder to locate the vertical wall studs behind the installation area. Important: Your mounting bracket must be anchored into at least one stud (two is better) to support the weight of the microwave. Mark these locations clearly.
Step 3: Set Your Templates
Tape the Wall Template to the back wall and the Top Template to the underside of the cabinet. Use your level to ensure the wall template is perfectly straight.
Drill Pilot Holes: Drill the holes for the bracket screws and the large hole for the power cord through the cabinet bottom.
Expert Tip: If your cabinet has a "lip" or recessed bottom, use wood filler blocks to create a flat surface. This prevents the microwave from tilting or the cabinet from cracking when you tighten the bolts.
Step 4: Install the Wall Bracket
Screw the mounting bracket into the studs using the provided lag bolts. For any holes that don't hit a stud, use heavy-duty toggle bolts.
Step 5: Adjust the Venting (If Necessary)
If you are venting to the outside, you may need to rotate the internal blower motor so the exhaust points toward your ductwork. Check your manual—this usually requires removing two screws and flipping the fan unit.
Step 6: The Heavy Lift
With your helper, lift the microwave and hook the bottom back edge onto the tabs of the wall bracket. While your helper holds it, thread the power cord up through the hole in the cabinet.
Step 7: Secure the Bolts
Insert the top mounting bolts through the cabinet floor and into the top of the microwave. Tighten them until the unit is snug and level. Plug it in and test the fan, light, and heating elements.

4. Featured Products: Efficiency & Clean Air
The ZLINE 30 in. OTR Convection Microwave
If you want professional performance, this ZLINE model is a top-tier choice. Its DiamondTech interior scatters microwaves for even heating, eliminating the need to stop and stir your food halfway through. It also features a sleek stainless steel finish and a 900-watt power rating.
The Microvisor: The Secret to Better Ventilation
Standard OTR microwaves often struggle to capture steam from the front burners. The Microvisor is a retractable extension that redirects up to 90% of fumes into the exhaust system, protecting your cabinets from grease and moisture.
Conclusion
Installing your own over-the-range microwave is a rewarding way to modernize your kitchen and improve its functionality. By following the templates and ensuring you're securely anchored into a stud, you’ll have a professional-grade setup in no time.

