

Renovation Series - Installing New Shower Tile
/Looking for a complete tutorial to install new tile in your bathroom? You’ve come to the right place! The Appliance Educator team is excited to bring you the next blog in the Renovation Series - Installing New Tile. One of our Appliance Educators has been renovating his bathroom and has created a complete tutorial for each step in the renovation process. Last week, we showed you how to install a built-in shower shelf. This week, it’s all about tiling! To install new tile, you’ll need:
Safety Glasses/Goggles
Safety Mask
Heavy-Duty Work Gloves
Tape Measure
Leveler
Assorted Trowels
Tile Saw
Premium Mortar
Grout
Ardex 8 + 9
Paint Roller or Paint Brush
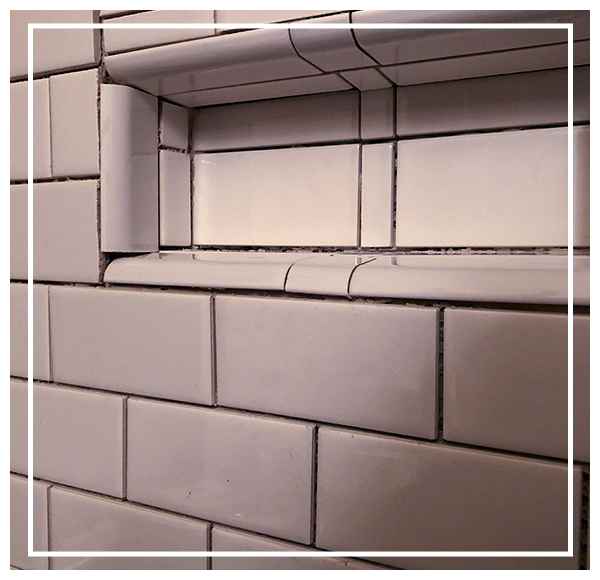
Once your cement boards and shower shelf are properly installed and the Ardex 8 + 9 Solution has cured for at least an hour and a half, you can start tiling your shower! Our Appliance Educator used this video tutorial from our partners Home RenoVision DIY, to learn how to lay subway tile! Although the video shows a tile installation in a kitchen, you can use the same method for your bathroom!
You’ll want to measure from the top of the shower tub, to the height of the tile. To make sure it’s completely level, you can install a piece of wood to act as a shelf. Use a leveler to ensure the piece of wood is as flat and level as possible. Once you have an idea in mind, you can start cutting your pieces of tile with a tile saw. We purchased ours from The Home Depot.

When all of your pieces are cut and ready to go, you can start laying tile! Our Appliance Educator used MAIPEI’s Premium Mortar for Tile and Stone. He made sure to evenly coat the back of the tile by using a straight edge of a tool. This will ensure the mortar has enough contact with substrate pores on the cement board. Be sure to place the tile firmly into the wet adhesive for secure contact!
Designing and laying out tile can be overwhelming. But our Appliance Educator came up with an innovative way to organize all of the tiles that he cut. He used tape that had pre-printed numbers and would lay out several rows, then go back and cut all the end pieces at once. On the back of each tile, he would write down the coordinating number to the piece of tape and whether or not it would be on the left or right side. This allowed him to cut many tiles at the same time, then go back and place them all at once!
Next week, we’ll show you how to remove your existing flooring in your bathroom! Make sure to follow Appliance Educator on Instagram, Facebook, Twitter, and Pinterest to get the latest updates on our Renovation Series. You can also check out more installation and video tutorials from Home Renovision DIY here!

