

Preparing and Installing a Bath Vanity
/The Appliance Educator team is excited to bring you the next blog in our Bathroom Renovation Series! This week we are going over the preparation work involved, as well as the installation for a bathroom vanity! Our Appliance Educator is looking to wrap up his bathroom remodel soon and has provided a step by step video on how to install a vanity that can be viewed here:
Preparation is arguably one of the most important steps when diving into a new project so make sure you get that morning coffee! Before we began on the vanity install, we made sure we had all of the required installation materials ready to go before starting any work. No matter how prepared you are it is almost inevitable you will have to make a run to the hardware store so the better prepared you are = fewer trips, more time saved, and fewer headaches!
The supplies we used for this install can be found at any Lowes and Home Depot and can end up cheaper than hiring someone to install! Here is a list of what we used:
1: Tape Measure and marking device
2: Various wood hole saws for a drill
3: Drill with bit for corresponding 3” construction screws
4: Circular saw or any other cutting tool (reciprocating saw, jigsaw, hacksaw, etc.)
5. Proper PPE (Gloves, Safety Glasses, etc.)
6: Pry bar or large flat head screwdriver
7: Stud finder
To start off the installation, our Appliance Educator measured out where he wanted the vanity and determined where the holes for the wall drain and hot and cold supply lines would land. He chose to use the correct sized hole saws to remove the backing from the vanity, but you can also cut out a rough square around the plumbing with some form of saw. This is all based on preference since it will almost never be seen so don’t worry about it being completely perfect! Our Appliance Educator then began cutting all of the holes but not before double checking his measurements. One of the most important tips he gave was to “measure twice and cut once” which helped save him a couple times on this project!

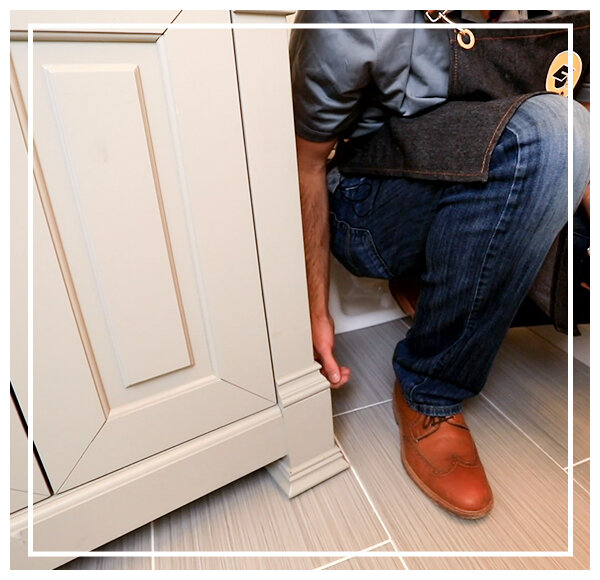
After all the holes were drilled, our Appliance Educator slid the vanity into place and marked the detail from the feet on to the baseboard. Then removed the baseboard with a pry bar and circular saw. After the baseboard was out of the way, he was able to secure the vanity to the wall. Using a stud finder, he found the studs located within the wall and attached the vanity using 3” construction screws.
Now that the vanity is installed, stay tuned for next week’s blog that shows how to install the countertop, faucet, and sink bowl!
Make sure to follow us on Instagram, Facebook, and Twitter so you don’t miss out on any updates! Feel free to tag us in any of your DIY projects, we would love to feature them!
Be sure to follow all of our social media channels for updates from Appliance Educator!
Facebook: Appliance Educator
Instagram: @appliance_educator
Twitter: @app_educator
Tik Tok: @appliance_educator
YouTube: Appliance Educator
Pinterest: @applianceeducator

