

How to Prepare for a Floor Installation
/
The Appliance Educator team is excited to bring you the next blog in the Renovation Series! One of our Appliance Educators has been renovating his bathroom and has created a complete tutorial for each step in the renovation process. A few weeks ago, our Appliance Educator showed you how to install new shower tile in your bathroom. This week, we’ll show you all the steps you should take before laying new flooring down! For this step of the remodel, you’ll need:
1. Notched Trowel
2. Type 1 Tile Adhesive
3. A Paint Scraper
4. Floor Tiles
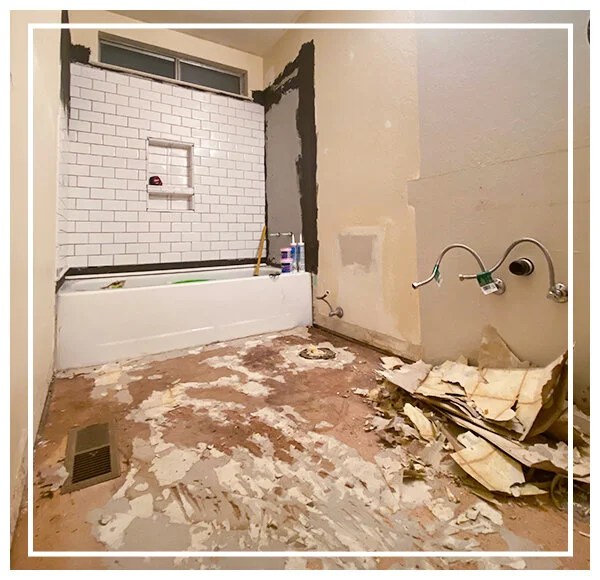
Before you can install new flooring, you’ll have to get rid of the old one! It’s important to remove as much of the existing flooring as possible and to make sure the floor is clear of debris.

Using a trowel and scraper, our Appliance Educator removed all of the previous vinyl flooring. After he removed a large portion of the floor, he noticed there were some spots where the old glue had cured. Since the mortar would easily adhere to the surface at the time of installation, he wouldn’t need to sand it down to the subfloor.
At this stage, it’s important to check on the health of the subfloor. Especially for an older home, be sure to check for water damage and ensure there hasn’t been any warping or bending of the subfloor over the past years.
For flooring, our Appliance Educator purchased the Anatolia Tile Ikon in Matte Porcelain. This tile is relatively new to Lowe’s and will help pull color from the gray vanity (we’ll show you how to install that later!) and white subway tiles he installed in the shower.
To figure out how many panels you will need to install for your remodel, measure the square footage of the room. From there, you’ll be able to find out how many tiles you need. It’s helpful to purchase a few extras in case any break. Our Appliance Educator broke one tile during his installation and ended up with exactly one whole tile left. Talk about a lucky break!
Once your floor is clean and ready to go, and you have your tiles prepped for placement, it’s time to install some flooring! You can use any type of flooring adhesive, but our Appliance Educator decided to go with Mapei Type 1 Tile Adhesive. More information about the adhesive can be found here. Mapei offers a wide range of mortar and tile adhesives to choose from.
Depending on what type of flooring material you use, a different type of adhesive may be needed. There are a few different factors you should consider when deciding between a flooring adhesive. For more information on what type of flooring adhesive to choose, please follow this link!
Next week, we’ll show you how to install the new tiles! Be sure to follow Appliance Educator on Instagram, Facebook, Twitter, and Pinterest to get the latest updates on our Renovation Series!

